Dread Head Headband
*originally posted back in 2014*
For a beginner crocheter, there is but so many things you feel that you can create. Getting to the “big stuff” (you know, your afghans and beautiful shawls) seems so far away in the future! But, the more you crochet, the more you learn!
For a beginner crocheter, there is but so many things you feel that you can create. Getting to the “big stuff” (you know, your afghans and beautiful shawls) seems so far away in the future! But, the more you crochet, the more you learn!
I'm a somewhat beginner crocheter and so I'm always on the lookout for something simple that I can whip up. I've only completed three things: a pair of uneven mittens, a travel case and a small tote (add the matching flower then I can brag and say that's four things). So, when I saw this pattern for a simple headband, I jumped on it!
 |
| The small, child tote... |
 |
| ... Matching flower! :D |
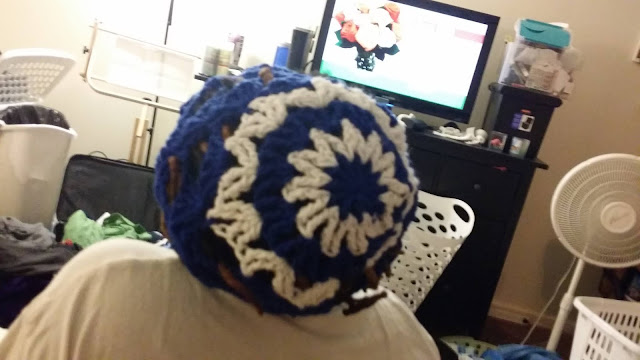
The one thing that caught my attention was the title of it: Dread Head. I've grown mine for a little over 6 years now; this hairstyle is more of a hassle than I originally planned for it to be: my hair grows so quickly that I literally need it done every two weeks! So, when I saw the title for this headband, I perked up: the one thing that is a necessity is a headband!
I was a bit sadden by the fact that it wasn't a headband only meant for people with dreads BUT... this is one of the easiest and quickest patterns I've encountered! All credit goes to blogger Vallieskids, who blogged this pattern, along with pictures of her beautiful girls wearing them, in 2010.
What You Will Need:
Size K/10 ½/6.50 MM crochet hook
Medium (4) yarn (this is the yarn that I used; you're free to experiment with other yarns); a small 5oz ball should be more than enough: it may be enough to make three or four headbands depending on you!
Stitches You Will Use:
*The pattern only calls for two: DC and SL ST with an option to add a SC edging*
SC: Single Crochet- insert your hook into specified stitch, yarn over, pull through stitch (you will have two loops on your hook), yarn over and pull through both loops.
DC: Double Crochet- yarn over, insert your hook into specified stitch, pull through stitch (you will have three loops on your hook), yarn over, pull through two loops (leaving two loops on your hook), yarn over and pull through both loops.
SL ST: Slip Stitch- insert your hook into specified stitch, yarn over and pull through stitch and loop on your hook.
Abbreviations and Terms:
Beg- beginning
CH- chain
ST- stitch
Rnd- round
WS- wrong side. This is the “back” of a chain where the stitches have a bar in the middle of them.
Fasten- after the last stitch, cut the working yarn about 2 to 4 inches. Pull yarn through last loop and tighten. You can use a smaller crochet hook or a large eye yarn needle to weave the loose end into the stitches.
First things first: you will need to get a measurement of the head. I measured around the top of my forehead, which is efficient due to the thickness of my dreads. Vallieskids didn't give out specific measurements. My head measured out to approximately 23 inches, which came out to a starting chain of 64. This may vary for everyone else due to how loose or tight you crochet. You will want to make sure to either round up or down to determine an even amount of stitches. Compare the chain to the measurement, making sure not to include the tail at the beginning of your chain. So:
CH X (where X is an even number according to your measurement). Join with SL ST, being very careful not to twist.
**I worked WS during Rnd 1. It was easier for me**
Rnd 1: CH 4 (counts as first DC and CH 1) *Skip next CH, DC in next CH, CH 1. Repeat from * around and then SL ST into 3rd CH of first CH 4.
Rnd 2: SL ST into first CH 1 space, CH 4. *DC in next CH 1 space, CH 1. Repeat from * around and then SL ST into 3rd CH of first CH 4.
Repeat Rnd 2 until you reach your desired length. Fasten and weave in excess yarn.
Edging (Optional): CH 1, SC in each ST around and then SL ST into beg rnd CH 1. Fasten and weave in excess yarn.
There ya go! I enjoyed making these headbands not only because it's an inexpensive way for me to get headbands in the color that I truly want (because I would have to buy a couple of those grouped ones in the stores to get all the colors and would end up with a couple of colors that I don't need...) but it also helps me practice stitches. So, play around with other stitches and see what cool designs you can make!
 |
| Guess that it's called Dread Head because the stitches look like mini dreads...? |
Edit: The 64 CH headband was my first attempt. It is slightly too big so the next one I make for myself will more than likely be cut down to 60 CH.
Comments
Post a Comment