Tip #1: Organization... and Your First Pattern!
I know what you're thinking: if she's not an expert, how can she help me? Well... smarty-pants, I can try! All I know is that when I initially started out, I had no one to tell me anything; the little I had learned, I learned from books that looked as though they were printed in the 70s! While the stitches have remained the same, a few other things have not.
When you pick up crocheting or knitting, you have to seriously ask yourself: am I in this for the long run? Quite honestly, most won't know until they actually get the hang of working stitches. Regardless, this first tip is intended for the serious ones: make space for your materials and your projects. Starting off, you may not buy a lot of yarn or needles. But once you make the decision that this is definitely something you're willing to put some effort into, your "collection" will start to grow... and it will grow rapidly! You're gonna need to start organizing!
 |
| This is one way to store your yarn! |
That means you may be investing into bins along with all that yarn and those various needles. If you have the room, bins are perfect for storing materials and projects, particularly the stacking ones. The more organized you are, the better for you to keep up with projects. Especially if you're like me and start on different projects at one time (currently, I have five...)!
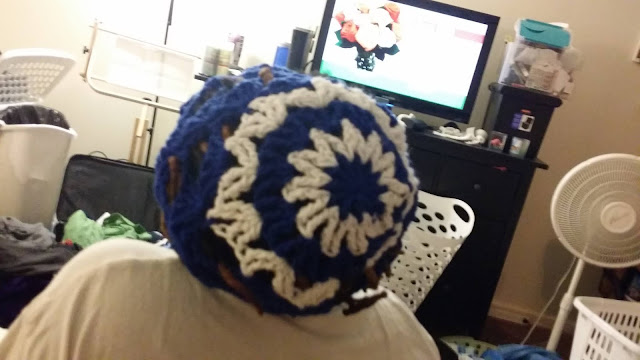
Needles. Or hooks; whatever you want to refer to them as! Either way, once you get in deep into crocheting, you will start to have a good collection of them. Now you can go out and buy a case for all of your needles... or you can put your craft into good use... and make yourself one!
 |
| Fancy-smancy $30 case... |
Well... lookie here... HERE'S YOUR FIRST PATTERN! :D
I'm going to give you beginners (and advanced crocheters; I don't discriminate...) your first pattern. It really is a Beginner pattern and will help you out tremendously, especially if you don't want to shell out the money to get yourself a case. This is an actual travel case for your hooks!
What You'll Need:
Size H/8/5 MM hook
Medium (4) worsted weight
Ribbon
*Whenever I give out pattern instructions, I will go over the stitches in each one. I may or may not provide still pictures; it's debatable at the moment...*
I got this free pattern elsewhere and it didn't state anything as far as a gauge to guide you. However, I will remind everyone that the gauge swatch is a MUST. This pattern does note that 16-20 stitches should measure out to 4 inches... if you're having problems adjusting to that, you can use whatever size hook to accommodate. It's preferred to either go one hook up or down; if your stitches are too tight with an H hook, go up to an I/5.5 MM hook: too loose, go down to an G/4.25 MM hook.
Gauge:
16-20 stitches should equal 4 inches across. Your swatch should measure out to a 4x4 inch square.
Stitches Used:
SC- single crochet: insert hook into specified stitch, yarn over, pull through stitch (you will have two loops on hook), yarn over and pull through both loops.
DC- double crochet: yarn over, insert hook into specified stitch, pull through stitch (you will have three loops on hook), yarn over, pull through two loops (leaving two loops on your hook), yarn over and pull through both loops.
SL ST- slip stitch: insert hook into specified stitch, yarn over and pull through both the stitch and loop on hook.
Abbreviations and Terms:
CC- Change Color
CH- Chain
Rep- Repeat
Rnd- Round
SK- Skip
SP- Space
ST- Stitch
Fasten- after the last stitch worked, cut working yarn approximately 2-4 inches. Pull yarn through last loop and tighten. Use either current hook or wide eye yarn needle to weave into stitches.
With Color A, CH 41
Row 1: SC across (40 ST), turn
Rows 2-17: CH 1, SC across (40 ST), turn
OPTIONAL: CC to Color B
Row 18: Rep Row 2
CC to Color A
Rows 19-35: Rep Row 2
Rnd 36: CH 1, SK 2 SPs, *5 DC in next SP, SK 2 SPs. Rep from * across row to last 2 SPs, SK 1 SP, 3 SC in corner SP. SC down left side to corner SP, 3 SC in corner SP, SK 2 SPs. Rep from * across row to last 2 SPs, SK 1 SP, 3 SC in corner SP. SC down right side, 2 SC in last SP. SL ST in first SC made.
Fasten and weave in excess yarn
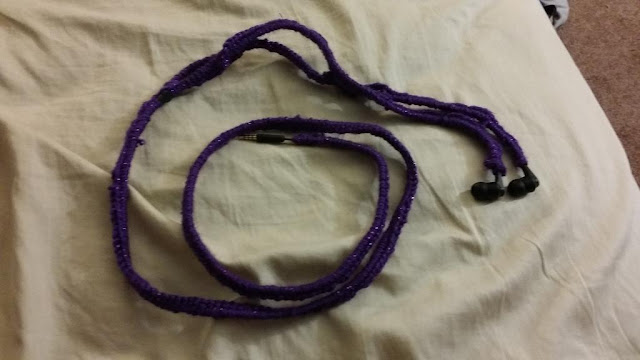
There you go! Your very own traveling case for your hooks! The ribbon used should be broad and long enough to tie the case securely after being wrapped. Be proud (I certainly am) and show it off!
The pattern called for an optional small strip as well as using an off-white main color and a blue-mint for the strip. This is your case; use whatever colors you want! I chose a green camo with a patriotic red, white and blue strip. The colors represent three aspects of my life, actually: the camo represents the time my husband and I served in the military and the strip... well, that serves two purposes, too: I was born on Flag Day and I'm American. I figured combining the two would be a nice touch!
 |
| My very own, homemade case! :D Pattern Courtesy of Esther Leavitt from Craftown |
Cute!
ReplyDelete